
How to add a computer
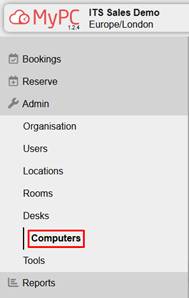
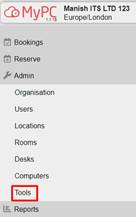
Access the Admin panel
Log in to MyPC Cloud.
Navigate to the admin section, where you’ll find configuration options related to rooms, desks, and bookings.
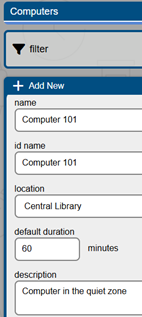
Adding a new computer
Look for the “Computers” section within the admin panel.
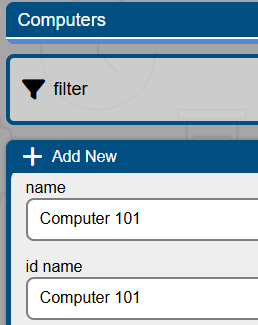
Click on “Add New” to create a new computer.

Computer details
Provide a descriptive name and ID name for the computer (e.g., “Computer 101”). The ID name is the NetBIOS name of the computer.
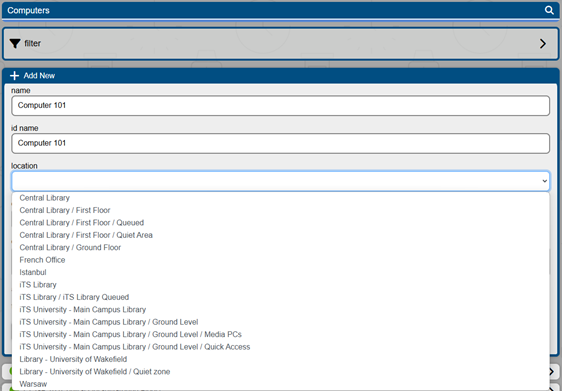
Select the physical location where this computer is situated. The system will present a dropdown list of previously added locations (such as different floors, buildings, or zones).
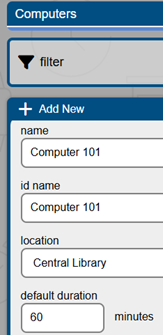
Default booking duration
Specify the default duration for bookings made at this computer. For instance, if most people book computers for 60 minutes, set that as the default. Users can always adjust it during reservation.
Description
You can also add a description to your computer.
Advanced options
Fine-tune some settings.
- Allowed booking methods: Choose which booking methods should be allowed for this location.
Note: A resource can use queueing only when it is in a queued location.
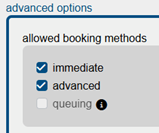
Note: If you wish to make computers only bookable by staff untick all booking methods.
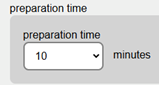
- Preparation Time: Add a buffer before and after bookings to allow for cleaning or setup.
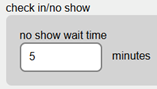
- Check in/No show wait time: Decide on the amount of time in minutes the PC will wait for the user to turn up for the booking.
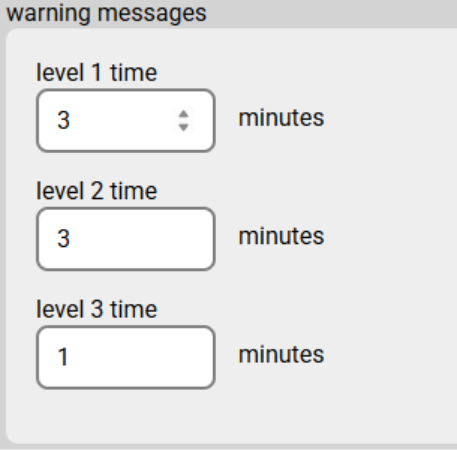
- Warning message: Number of minutes before the end of the session where the client warns the user that they will be logged off.
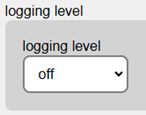
- Logging level: Used to enable client logs for troubleshooting. Options are Off/Debug.
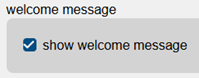
- Welcome message: Show welcome message to users on client.
- Aup message: Show an acceptable usage policy message to users on a client

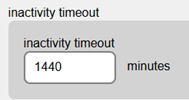
- Inactivity timeout: If the PC is left idle without keyboard or mouse movement this timeout in minutes will try to lock the workstation.
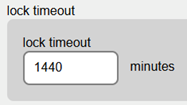
- Lock timeout: Once the PC is locked this timeout in minutes will be used to log the user off the PC (no warnings).
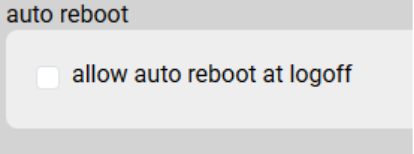
- Auto Reboot: When the session time expires or the user initiates a logoff, this option will automatically restart the computer. Useful when using a restart to restore software.
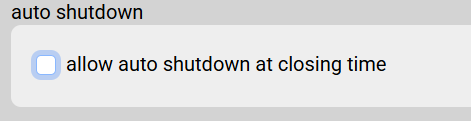
- Auto Shutdown: When a location is closed, the system will automatically schedule the computer to shut down. Please note that the shutdown will occur 5 minutes after the location is closed. If the computer is restarted after the auto shutdown, it will remain powered on.
Please note this will require client 1.34 or higher.
Tags & Booking rules
Add tags to either categorize a resource or to create advanced booking rules for resources.
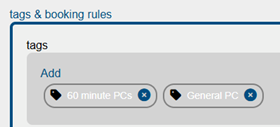
You can also configure booking rules and desktop profiles by clicking on an existing tag and modifying the parameters of a rule or profile already in place. Alternatively, creating a new tag allows for introducing a fresh set of rules. The summary option provides a way to check how the rules and profiles are applied.


Finalise and add
- Once you’re satisfied with the computer details and settings, click the “Add” button.

Congratulations! Your new computer is now part of the system and available for booking.
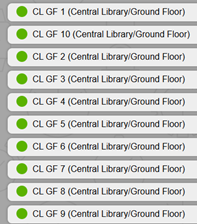
Bulk computer creation (optional)
If you have multiple computers to add (e.g., in an open-plan office):
- Proceed in the same way as you would with adding a single computer.
- At the end of the process instead of clicking on “Add” click on “Add Multiple”.
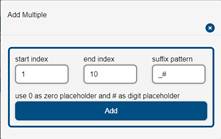
- Choose the start and end index.
- Click on “Add”
- The system will add multiple computers which will have the same name and settings, but with a different number appended to the end.
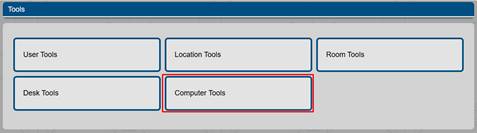
Alternatively, import computers from a CSV file:
- Navigate to the admin section and choose “Tools”.
- Click on “Computer Tools”.
- Download our CSV file template and populate it with some basic details for each computer.
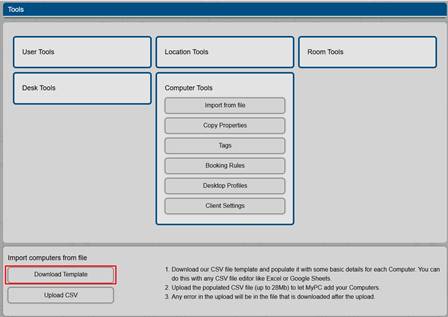
- Upload the populated CSV file (up to 28Mb) to let MyPC add your computers.
- If any error occurs in the upload, it will be indicated in the file that is downloaded after the upload.