
How to book a room
Login to MyPC
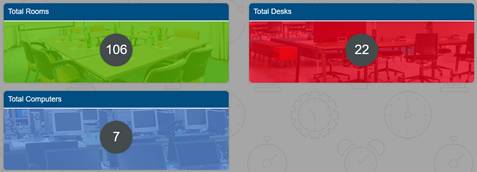
Log in to your MyPC account using your credentials. Upon logging in, you’ll land on the dashboard, which displays the total available rooms and desks.
Access room booking
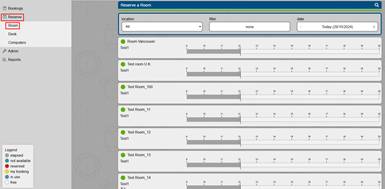
Click on “Rooms” or navigate to the left menu and select “Reserve” followed by “Room.”
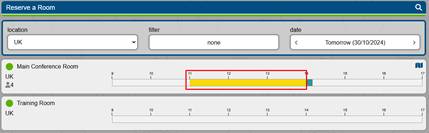
You’ll see a list of all available rooms.
Filter and choose a room
Use filters to narrow down your search:
- Location: Select the desired location (e.g., floor, building).
- Other Filters: These may include specific room properties (e.g., projector, whiteboard).
- Date: Choose the date for your booking.
- Use dropdown options or drag the dark blue slider.
Hover your mouse over an available room to see a dark blue marker indicating the approximate start and end time based on the room’s default duration.
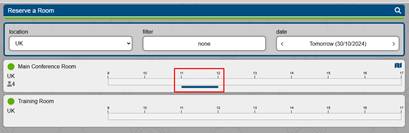
Select booking time
Click on the dark blue bar to open a dialog.
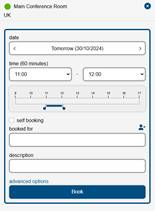
Fine-tune your start and end times:
- Add an optional description (e.g., meeting purpose).
- Optionally invite others by adding their email addresses (MyPC will send them an email with an .ics file).
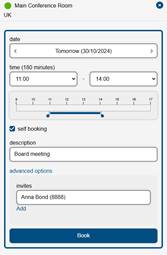
Finalise booking
Click “Book” to confirm your reservation. If the room has the “Check-In” option enabled, you’ll see a PIN code required to start the booking (more on this below).

Review and confirm
Click “Continue” or go to “My Bookings” to review your booking. MyPC booking interface will now display your reservation.
Booking a room as an admin
Follow the same steps as above
Admins follow the same process as users. However, there’s an additional option to book on behalf of someone.
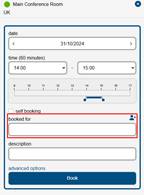
Booking for another user
Enter the username (email) of the user you want to book for.
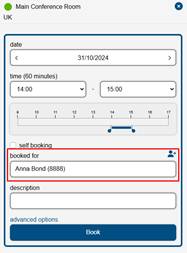
The user must be invited to use your organization’s MyPC instance.
Confirmation
Once you click “Book,” the user you booked for will receive an email confirmation.