
How to make a Block Booking
Block bookings allow staff to reserve multiple computers simultaneously through the MyPC web interface. This feature is especially useful for organising classes, workshops, or group sessions where access to several PCs is required at the same time. By streamlining the reservation process, block bookings help ensure efficient allocation of resources for planned activities.
Creating a Block Booking
Navigate to the Desired Location
Use the search or browse function to locate a PC in the area where you want to make the booking.
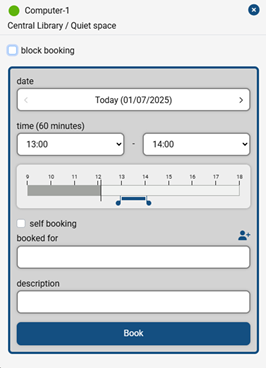
Initiate the Booking
Click on one of the PCs in the desired location to begin the booking process.
If you are an Owner, Super Admin, or Admin, you will see an option to create a Block Booking. Select this option.
Configure Booking Details
Once Block Booking is selected, the dialog will update to allow you to:
- Set the start and end time
- Enter a block booking name
- Optionally, set a password
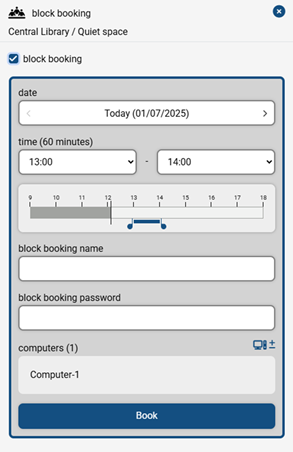
*We recommend using a password, as users are not individually assigned to the booking. Only those who know the password can access the reserved PCs.
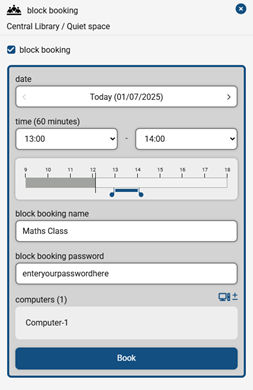
Add or Remove Computers
After entering the name and password, you can add or remove additional computers.
Click the 
Use the Select All or Deselect All options as needed.
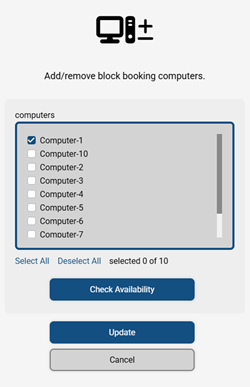
*Note: Only computers from the same location as the first selected PC will be listed.
Check Availability
Use the Check Availability button to verify that the selected computers are free at the desired time. Unavailable computers will appear greyed out.
*If you skip this step and attempt to book unavailable PCs, the system will alert you.
Finalise the Booking
Click Update to add the selected computers.
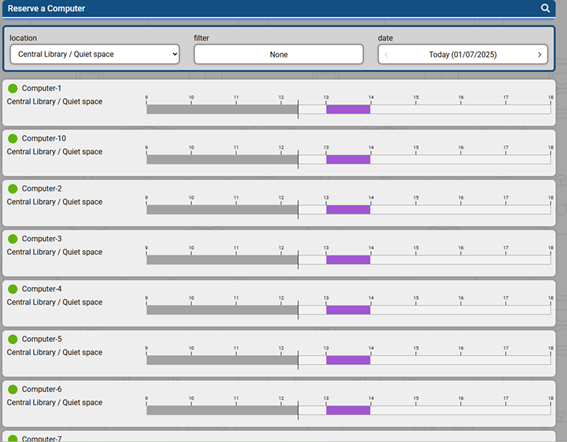
Then, confirm the booking. The reserved time slots will appear in purple (depending on your theme) on the booking screen.
Managing a Block Booking
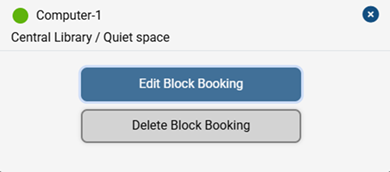
To Edit: Click on any of the booked computers and select Edit Block Booking.
You can:
- Modify the start or end time
- review the password
- Add or remove computers
To Delete: Click on any of the booked computers and select Delete Block Booking.